The most expensive hike in the world? Meet the Troll’s Tongue.
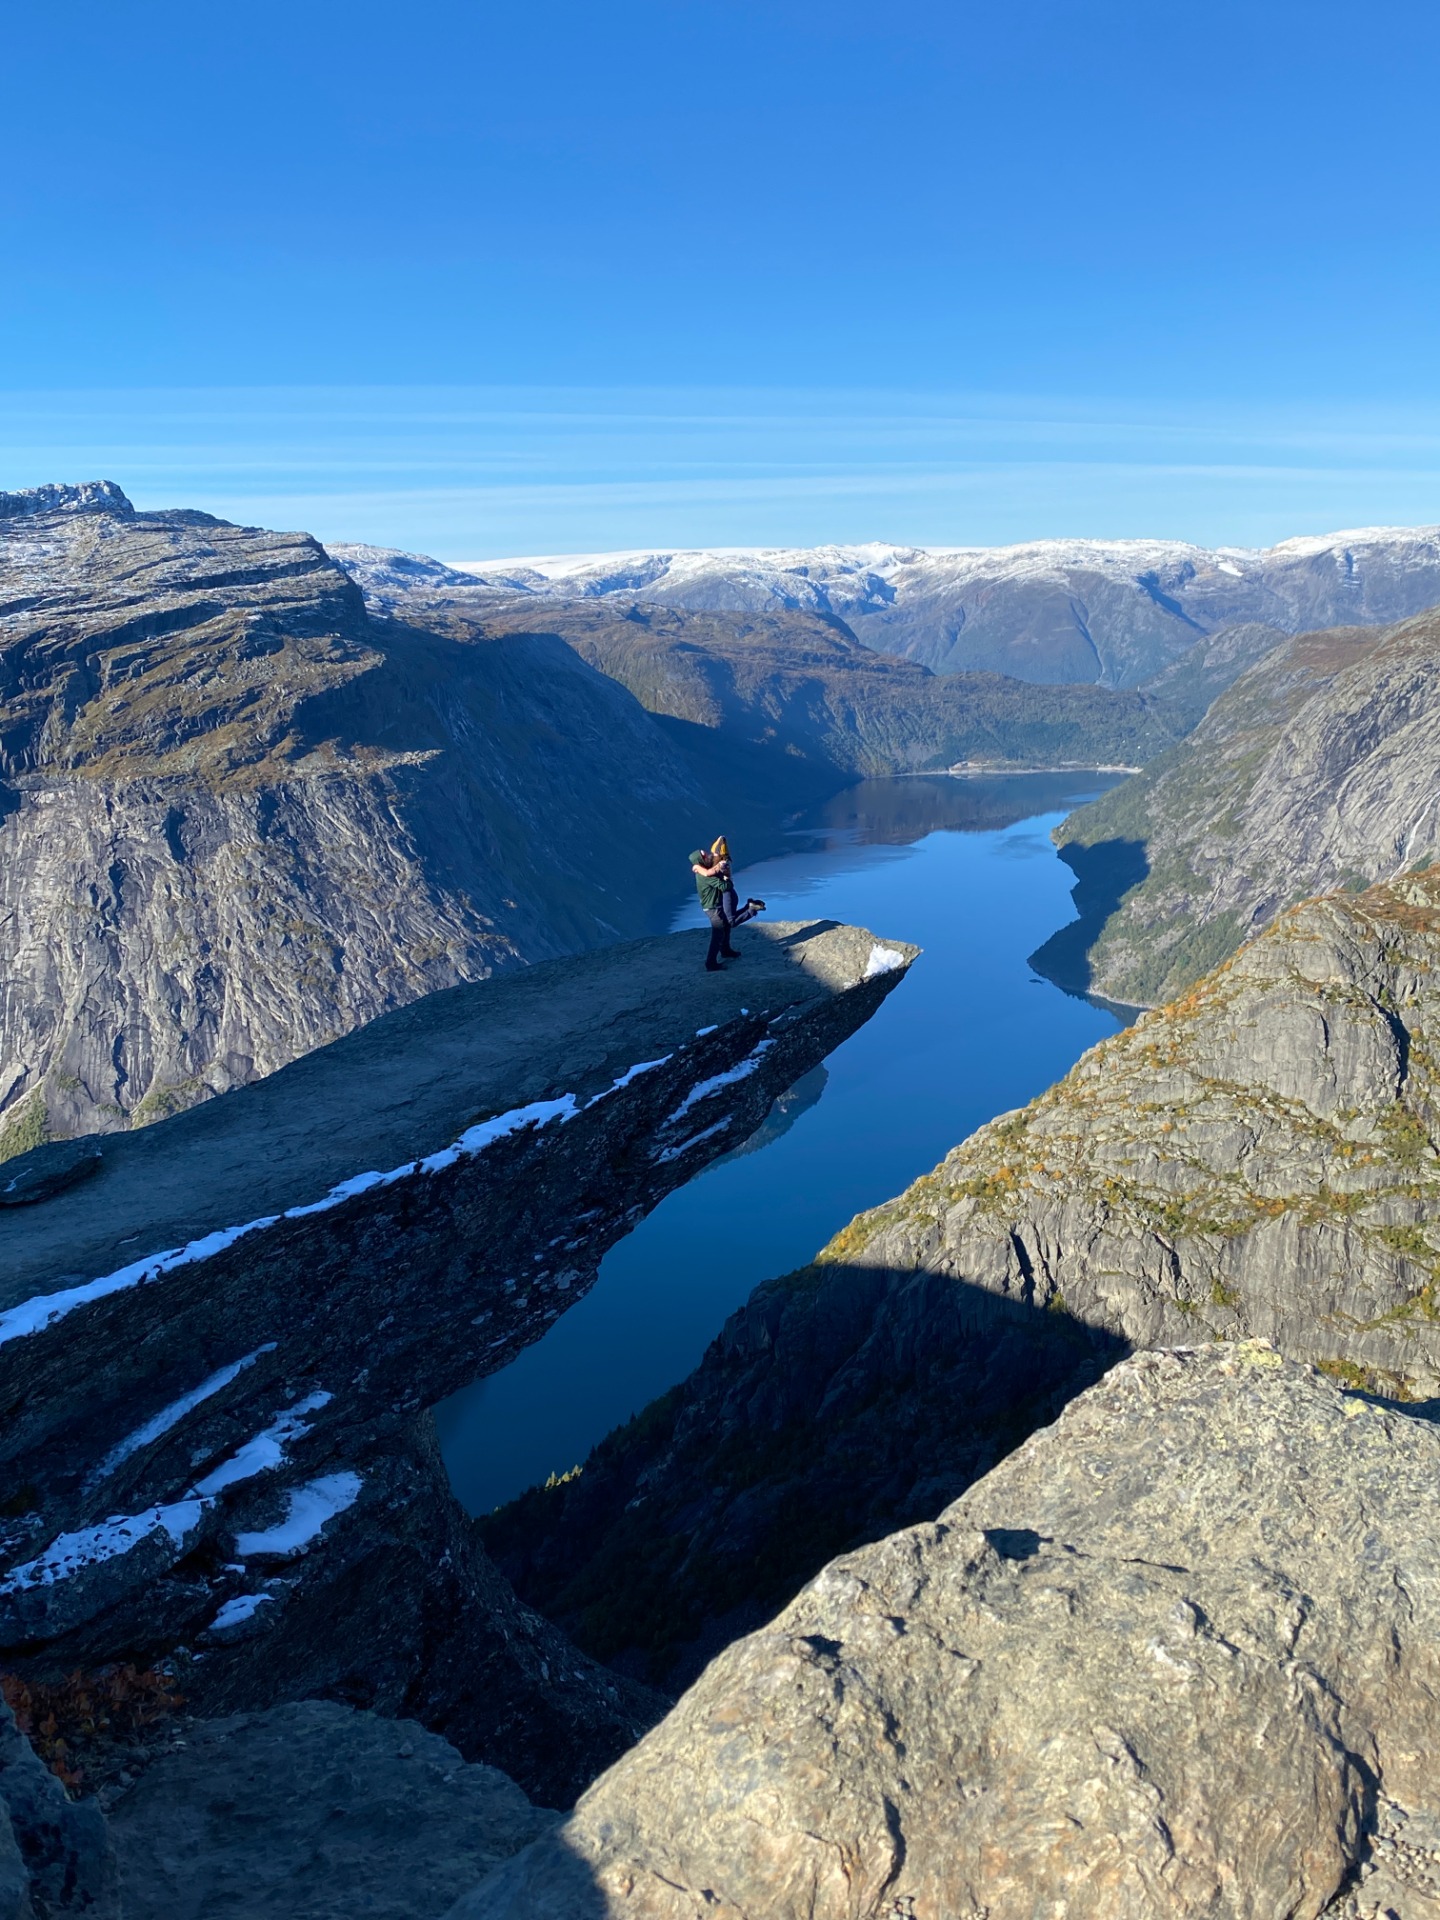
We've been living in Norway for two months, and we kept waiting for the right time to go on a real hike. In the end, we chose Trolltunga, which means "Troll's Tongue."
We had heard many things about this place — some said it's beautiful, others said it's too expensive, and some warned that the trail is endless. So, we decided to try it ourselves and share our experience with you.
At the end of the article, you'll also find some useful tips and a full budget breakdown — which might make your head spin a little.

ACCOMMODATION:
To make the trip work, we needed at least two days. Trolltunga is a full-day hike, and it's best to start as early in the morning as possible.
On the first day, we went to the town of Tyssedal, which is only about 20 minutes from the parking lot where the trail begins. Luckily, we found an affordable place to stay — a simple hostel. We slept in a shared room and arrived around nine in the evening. There was only one other person there, already trying to sleep, so we quickly dropped our bags, made some food and snacks for the next day in the kitchen, moved the beds around a bit, and went to sleep.
A funny thing happened in the common area — an older Norwegian man stopped us. He said he lived upstairs, but he seemed so unusual that I started calling him Odin. He had a walking stick, a long beard, and looked like he had been alive for centuries. He told us stories about hiking to Trolltunga long before there was a marked trail. He even gave us tips like which tree to turn at and which waterfall to follow. Of course, today the trail is very well marked, so you don't need to worry about getting lost.
TRANSPORTATION:
The next day we started early — at exactly 5:30 a.m. We left our car at parking lot P2, and that's where our adventure began.
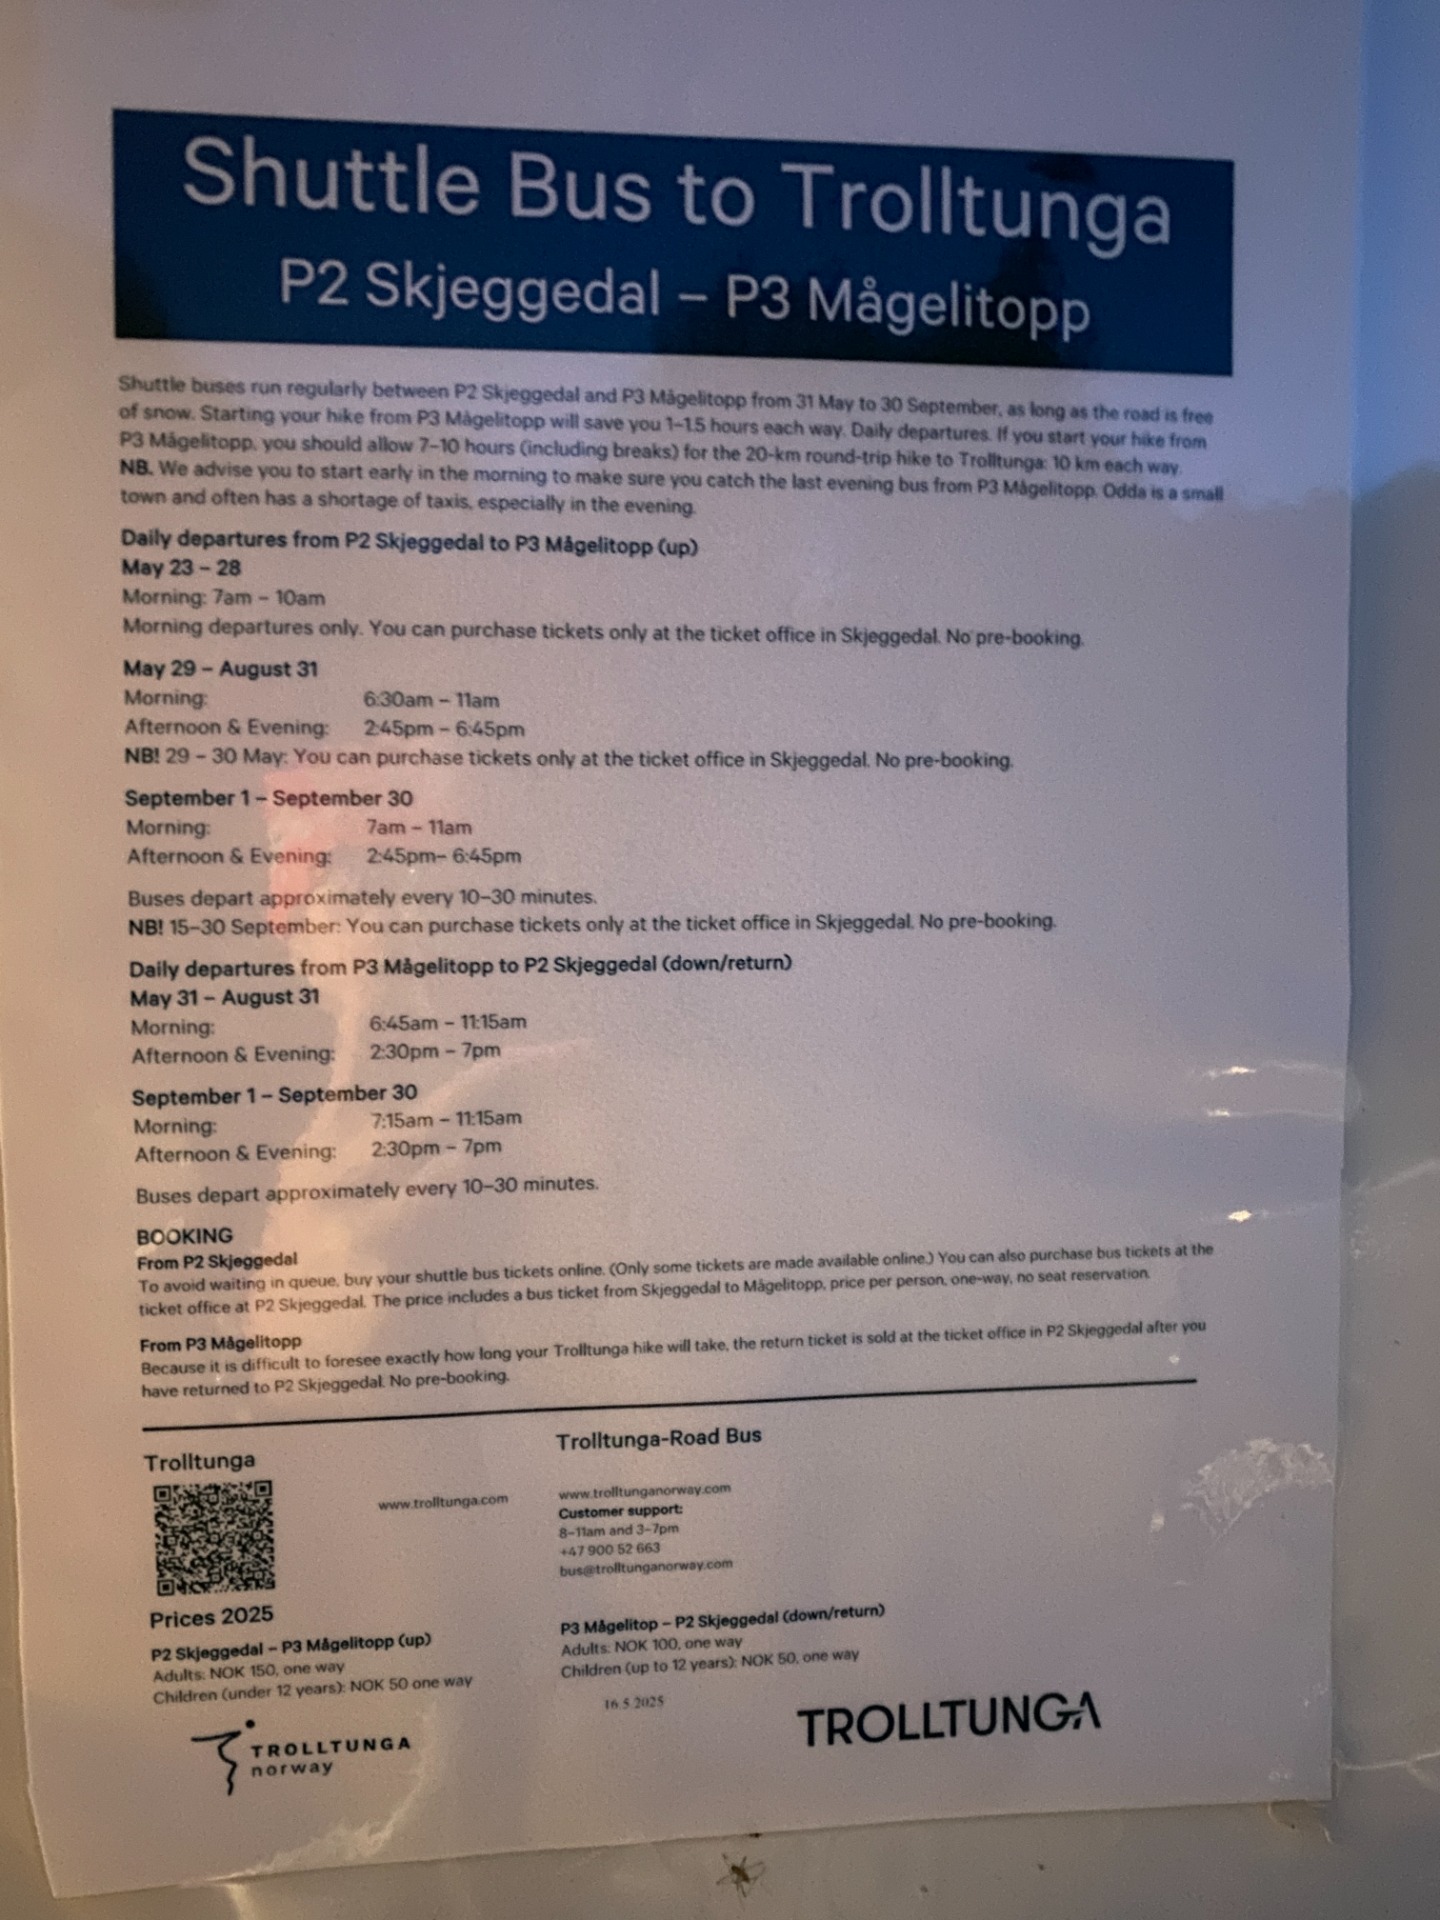
During the main season, you can also take a shuttle bus to Trolltunga. It runs from the town of Odda, goes through Tyssedal, and ends at the P2 Skjeggedal parking area, right below the trail. If you don't want to deal with driving or parking, it's a comfortable option. (You can find the schedule and ticket prices [HERE].)
If you decide to go by car, there are three parking options:
P1 Tyssedal
💰 Price: about 300 NOK/day
📏 Distance: the longest option, about 38 km round trip
→ Only worth it if P2 is full or if you really want to save money.
P2 Skjeggedal
💰 Price: 500 NOK/day (+ toll about 200 NOK)
📏 Distance: the classic Trolltunga hike — about 27 km round trip
→ The most common choice among hikers. The shuttle bus also stops here.
P3 Mågelitopp
💰 Price: 600 NOK/day (+ toll about 200 NOK)
📏 Distance: the shortest option, about 20 km round trip
→ Parking here is limited and must be booked in advance, but it saves you around 7–8 km of walking.
We ended up parking at P2 Skjeggedal. We hadn't booked P3 in advance (we travel YOLO style), and P1 was simply too far away.
From P2, there's another local shuttle bus that takes hikers directly up to P3 Mågelitopp. The bus runs about every 20 minutes, but info online is hard to find and often confusing — that's one reason we decided to write this article.
We arrived at the stop around 6:30 a.m., but since it was already September (outside the main season), the first bus didn't leave until 7:00 a.m. So we waited half an hour in freezing cold — Norway greeted us with –2°C. Mirka was smiling through it, but after just five hours of sleep, I was standing there shaking like a leaf.
Finally, the bus came, and we bought tickets to go up — 150 NOK one way, 100 NOK down. To save a bit of money, we only bought the ticket up. Going down, we figured, we'd just walk it ourselves.
THE ASCENT:
The hike to Trolltunga — including the way back — took us about 8 hours in total. We stayed on the famous rock ledge for almost an hour, just enough time to enjoy the atmosphere, take all the photos we wanted, and really feel what it's like to stand on one of Norway's most iconic spots.
The trail is long, but not too steep, so it's actually quite pleasant to walk. Along the way, we passed a few shelters that hikers can use if the weather turns bad. There's also a designated camping area, so if you're up for some adventure and want to watch the sunrise or sunset right at Trolltunga, you can spend the night there.
Since we went in September, there were far fewer tourists than in summer. We'd heard that in high season, the line for a photo on the rock can take up to two hours if you don't arrive early in the morning. We were lucky — we went out on Trolltunga three times to take all the shots we wanted, and there was no waiting at all. On the way back, though, we passed lots of people heading up — proof that if you want the views to yourself, it's really worth starting early.
And those views were incredible! The whole trail offered breathtaking scenery — deep valleys, turquoise lakes, snowy peaks, and steep cliffs. Every kilometer gave us a new, stunning sight, and we ended up pulling out the camera way more often than planned.
PRACTICAL INFORMATION:
-
The main season for Trolltunga is from June 1 to September 30.
-
Outside this period, the weather is unpredictable and the trail is often covered with snow — you can only go with a guide.
Tips:

BUDGET:
Accommodation for 1 night: 801 NOK ≈ €70.50
Parking at P2: 500 NOK ≈ €44.00
Shuttle bus (uphill, 2 people): 300 NOK ≈ €26.40
Total: 1601 NOK ≈ €140.90
